Making A Website 05 - Adding A Blog
| 3 min read
Creating this light website has been really fun, but in its current form, there isn't much you can do with it. You may want to use it as a place for sharing your thoughts or knowledge with the world. So in this post we're going to add a blog.
Why have a blog?
Personally, I really enjoy writing on this blog. I find the process of writing cathartic, and I really enjoy the engagements I have with my readers.
However, you may want your light website to be nothing more than a kind of online business card, or a place to easily give people your contact/social links. That's absolutely fine; and the website we currently have will do that well. If that's you, feel free to skip this post.
But if like me, you want to share your thoughts, likes, interests and knowledge with other people, you're going to need a blog. So let's look at adding a basic blog to our site.
Blog Home
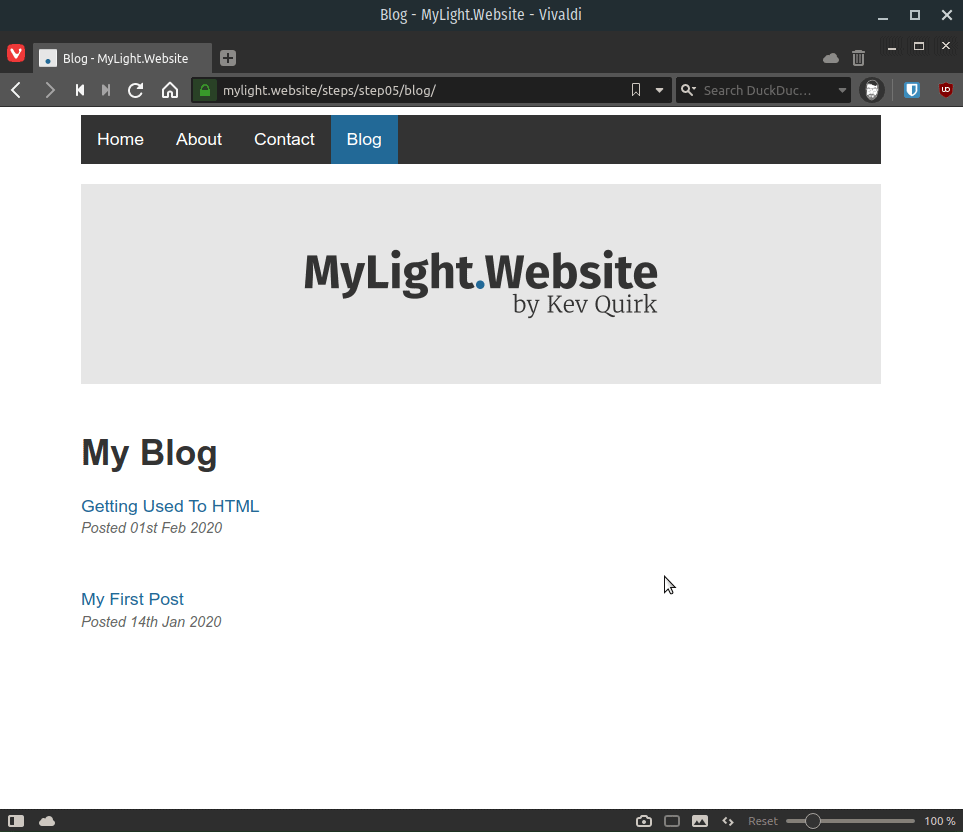
The first thing we need to do is add a home for our blog. This is a page that displays links to all of the blog posts on our site. If you go to the homepage of this site, you will see what I mean.
To do this, we will start off with the template file we created in step 03 of this series. Here's what you need to do:
- Create a new folder and call it
blog. - Copy your
template.htmlfile to yourblogfolder. - Rename the copy to
index.html. - Add a menu item to all of your pages that points to
/blog. - Precede all links in your menu with a forward slash.
Remember to add class="active" to the menu links that are active for each page.
Once you have made all of the changes above, here is what the menu should look like on your blog page:
<!-- *** NAVIGATION SECTION *** -->
<ul class="nav">
  <li class="nav"><a href="/index.html" >Home</a></li>
  <li class="nav"><a href="/about.html">About</a></li>
  <li class="nav"><a href="/contact.html">Contact</a></li>
  <li class="nav"><a href="/blog" class="active">Blog</a></li>
</ul>
<!-- *** END NAVIGATION *** -->
Once you have the main blog page added, it's now time to add our first post. The first thing we need to do is create another folder within the blog ****folder, called posts. This is where we will store all of our blog posts.
Now we're in our new posts folder, create another folder called 00-template. Within that folder, create another folder called images.
Each blog post will have it's own folder. I would recommend using a sequential number, followed by the blog post's title for this:
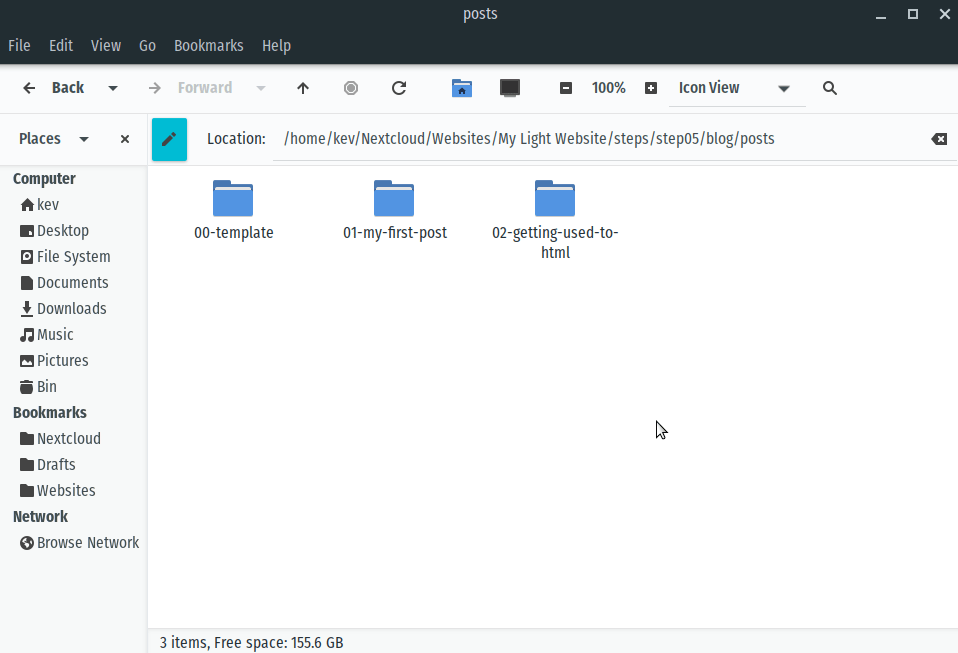
If you look at the blog on step 5 of mylightwebsite.kevq.uk, you will see the two blog posts shown in the image above.
Next we need to make a blog post template. You can use the page template we already have, and make some changes to it.
I'd also recommend adding a checklist at the bottom of the page, so you don't forget to update anything when writing a new post. This can be in the form of a HTML comment, so it's not visible within the post.
Once that's done, the source code for your post template should look something like this:
<!DOCTYPE html>
<html>
<head>
<link href="/style.css" rel="stylesheet" type="text/css" media="all">
<meta name="viewport" content="width=device-width, initial-scale=1.0">
<link rel="shortcut icon" href="/images/favicon.png" />
<title>CHANGE ME</title>
</head>
<body>
<div class="main">
<!-- *** NAVIGATION SECTION *** -->
<ul class="nav">
  <li class="nav"><a href="/index.html" >Home</a></li>
  <li class="nav"><a href="/about.html">About</a></li>
  <li class="nav"><a href="/contact.html">Contact</a></li>
  <li class="nav"><a href="/blog" class="active">Blog</a></li>
</ul>
<!-- *** END NAVIGATION *** -->
<!-- *** START PAGE CONTENT *** -->
<h1>YOUR TITLE HERE</h1>
<p class="meta">Posted DATE</p>
<img src="images/image.jpg"</img>
<p>START TYPING YOUR CONTENT HERE...</p>
<!-- *** END PAGE CONTENT *** -->
<!-- **PUBLISHING CHECKLIST**
Here's a checklist of all the things you need to change:
  - Change the page title (line 7)
  - Change the post title (line 22)
  - Change the post date (line 23)
  - Change the img link to add a header image, or remove it completely (line 25)
  - Add your content!
  - Update the blog page with a link to the new post.
** END CHECKLIST** //-->
</div>
</body>
</html>
If you want to add images to your blog post, add them to your /images folders within the posts' directory. Then add the correct <img> html to embed your images. For example, if you're adding an image called laptop.jpg the code would be as follows:
<img src="images/laptop.jpg"</img>Once you have created your blog posts, you need to add them to your list of posts on the main blog page. You do this by adding the following HTML to the content section of your blog page:
<p><a href="posts/02-getting-used-to-html/">Getting Used To HTML</a></p>
<p class="meta">Posted 01st Feb 2020</p>
<br>
<p><a href="posts/01-my-first-post/">My First Post</a></p>
<p class="meta">Posted 14th Jan 2020</p>
The <br> tag adds a line break, so you can make the gap between the post titles bigger. All this does is separate the blog post titles a little, so it's clear where one ends and another begins.
Meta CSS
Notice how the date on both the template page and the post page is formatted a little differently? It's smaller, italic and light grey. This is because we have used class="meta" when coding the date.
What we need to do now, is add some CSS to our style.css file so that it's formatted correctly:
/* Custom typography */
p.meta {
  font-size: 0.9rem;
  font-style: italic;
  color: var(--light);
  margin-top: -1em;
}
That's It!
You've just added a blog to your light website. When you want to write a new blog post, just copy and past your 00-template folder, then edit your post and update the main blog page.
In the 6th and final post in this series, we will be adding a few finishing touches to our light website to finish things off.
You can follow along with the entire series on my dedicated website, mylightwebsite.kevq.uk. It will show you each step in a wizard-like format, and there are also links to download all the source code.
Subscribe for more!
You don't have to keep coming back here to read my latest waffle. There's a couple of ways to subscribe to receive updates whenever I publish new content.