Getting Started With Mastodon
| 10 min read
I recently wrote and article on how Mastodon works; that seemed to get a hell of a lot of attention and positive feedback. However, a number of people asked for specifics on how the user interface (UI) within Mastodon actually worked, and how to get started with the platform. So I thought I’d write a follow up piece on getting started with Mastodon.
For the purposes of this post, I’m going to assume that you have chosen an instance and are ready to sign up and start using Mastodon. So, without further ado, let’s dive in…
Sign Up
I think this is probably an obvious step; but you need to sign up for an instance before you can actually start using it. In this example, I’m going to use the instance I run, Fosstodon.
The only thing you need in order to sign up for an account on Mastodon, is a valid email address. This is because a validation email is sent to your email address and you need to click a link to activate. This is purely to try and reduce spam bot accounts.
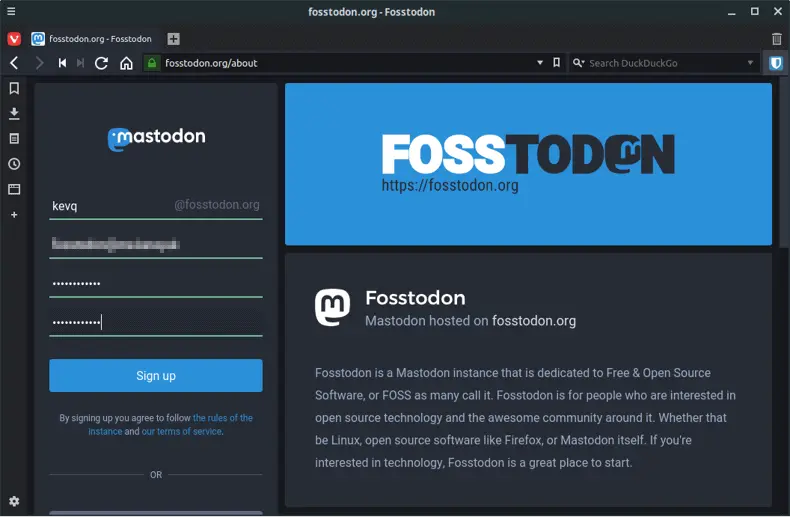
Once you have chosen a username and entered your email address and password, hit the Sign up button. You will then receive an activation link in to your mailbox. If you don’t, check your spam folder. Once you have verified your email, it’s time to log in and see what’s happening.
First Impressions
The first time you log in to your new Mastodon, you will be taken through a quick welcome wizard. This will tell you some useful information, like what your full Mastodon handle is, setting up your profile and some of the basics of the UI.
Once you have gone through the wizard, you are then greeted with the Mastodon UI. It will likely look pretty barren to begin with, but hopefully that will change after some usage.
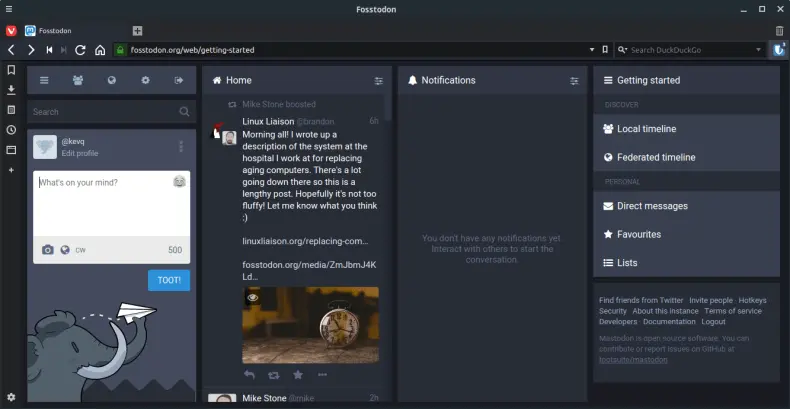
So let’s break down the UI into its sections and explain what they are. Once we have a better understanding, we can start looking at setting things up just how we want them.
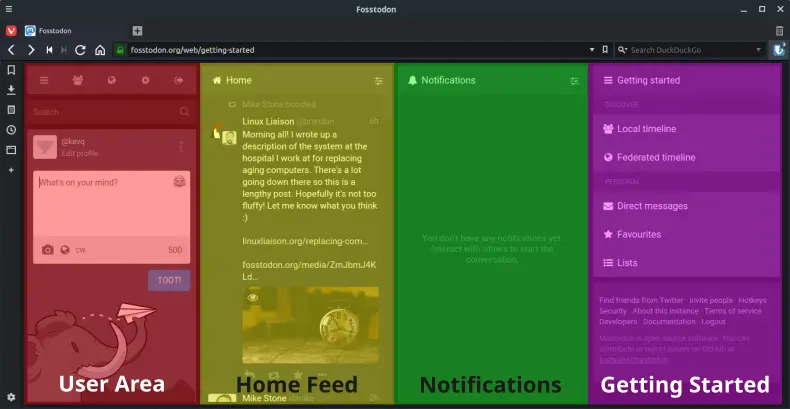
User Area
The first part of the Mastodon UI we’re going to look at is the User Area. From here you manage any aspect of your account, edit your profile, search for people and most importantly TOOT!
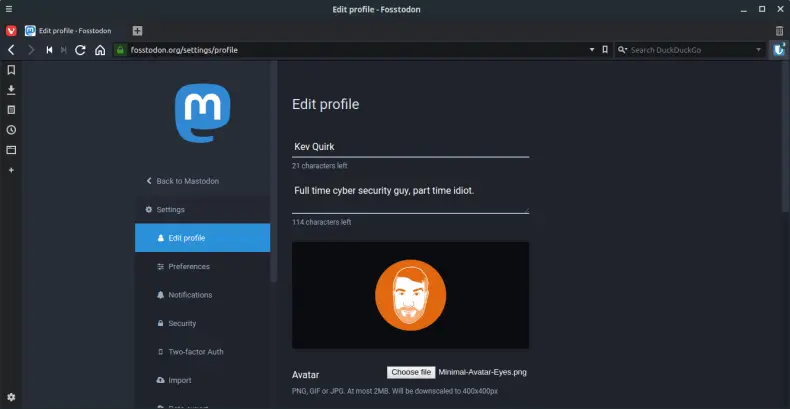
Let’s start by editing our profile. To do this, click on the Edit profile link that’s located under your user handle. Once in the profile editor, you can do or the normal things you would expect from an online community. Some of the things you can do are:
- Set a display name (this doesn’t have to be your real name).
- Enter a short bio about yourself.
- Upload an avatar and cover image.
- Lock your account so you have to approve any follow requests from other users.
- Set profile metadata – these are basically links to other places on the Internet. Useful for other social accounts or websites.
I’d suggest you upload an avatar as soon as possible, as accounts without avatars are less personable and tend to look like spam accounts. Especially if you have chosen an obscure username.
As well as editing our profile, we can also use the User Area to search for other people or hashtags within the Fediverse, as well as composing Toots; but more on that later.
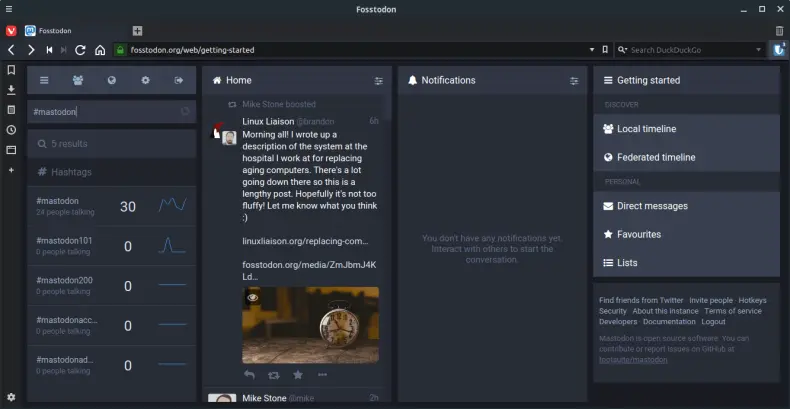
Home Feed
The Home Feed is where most of the action happens. This is the same as your Home Feed on Twitter, in that it’s the list of Toots from all the accounts you follow from across the Fediverse.
If you signed up to Fosstodon, you may be wondering why there are some Toots on there already if you haven’t actually follows anyone yet? Well, that’s because we have it so that all new users automatically follow the admin accounts on the instance when they sign up. This means that you at least has some content available to you as soon as you log in, before changing anything.
The great thing about the Home Feed, and all feeds in Mastodon actually, is that all Toots are displayed in chronological order. So there’s no weird reshuffling of Toots every time the page is refreshed. So if you haven’t logged in for 12 hours, you know exactly how far back you need to go before you’re all caught up.
Notifications
Again, this one is pretty self-explanatory really as it works in much the same way as Twitter. You guessed it – Notifications is where your notifications show up. SHOCK HORROR!
You will receive a notification when someone interacts with your account. That could be a new follower, a boost or like of one of your Toots, an @mention, or a reply to one of your Toots. Oh look, I got a mention!

As you can see in the image above, Mike mentioned me in a Toot, so that shows up in my Notifications, but it also shows in my Home Feed as I’m following Mike.
Getting Started
The last part of the Mastodon UI is the Getting Started section. From here you can see a number of other sections within the Mastodon UI, such as the local and federated timelines (if you don’t know what they are, I suggest you loop back and read my post on how Mastodon works), direct messages, favourites and lists – more on them in a future post.
If you click on the Local or Federated Timeline links, the Getting Started section will turn in to a feed of those timelines. Here is the local timeline from Fosstodon:
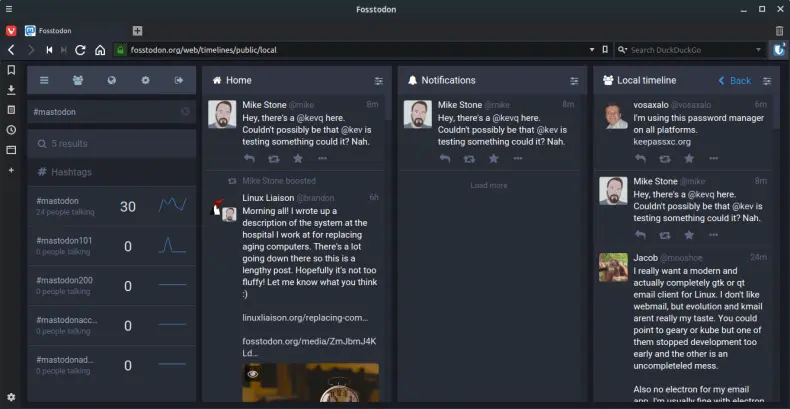
The Local and Federated Timelines are a great place for new users to start hunting for people to follow. If at any point you want to go back to the Getting Started section, you simply need to click on the Back link at the top of the timeline.
Editing The UI
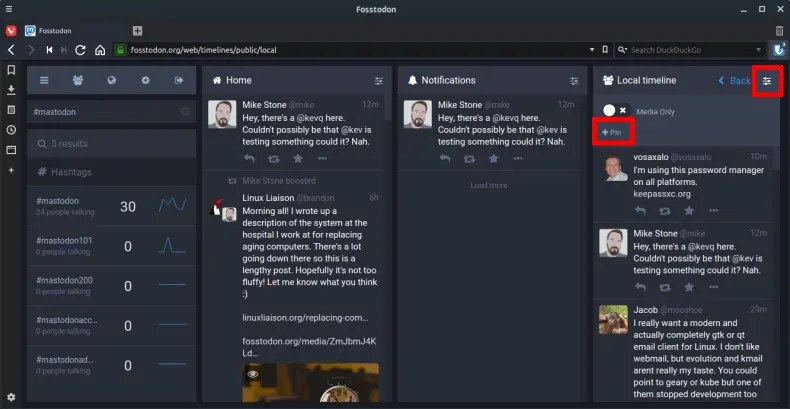
Now, you may well decide, for example, that you want to always have the Local Timeline on display instead of your Notifications. You can do that easily within the Mastodon UI, and much more.
First, click on the Settings Icon next to the Back link. A popup will then appear that will allow you to pin that feed. Once done, that feed will be permanently displayed and the Getting Started section will shift over to a new section.
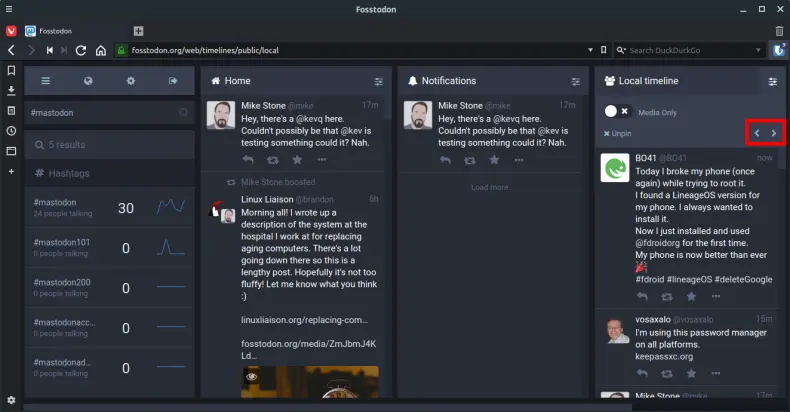
If you wish, you can also re-order the sections that you have pinned by using the left and right arrows within the same settings popup that you use to pin a section. If you want to remove a section, simply reverse the process above.
Composing Toots
Finally, let’s take a quick look at how you compose a Toot – obviously you can do a simple text-based Toot. I’m not going to go in to the details of that one, as I’m sure everyone reading this knows how to type text and click a button.
However, there are additional things you can do with Toots, such as:
- @mention any other user in the Fediverse.
- Add emojis, pictures and hashtags.
- Change the privacy of a Toot.
- Put your Toot/image behind a Content Wall.
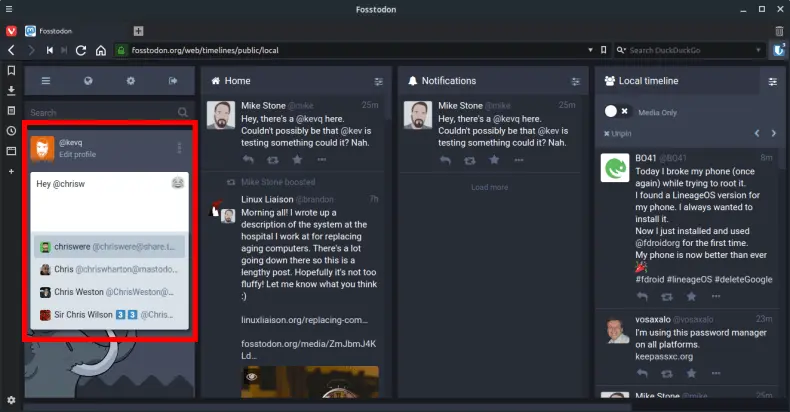
@mentions
These work in a similar way to Twitter. If you want to mention another person that’s on the same instance as you, then you simply use @username. However, if you want to @mention someone on another instance, then you need to use @user@instance.
Lucky for you Mastodon has an auto-complete feature when it detects an @mention, so you won’t need to remember the username and instance of everyone you want to mention. Better still, the auto-complete checks both people’s username and their display name.
Media
Adding media, such as emojis, hashtags and images is really simple. Just hit the emoji icon located at the top right-hand corner of the Toot editor. From there, you can pick from a selection of standard emojis, or even some custom emojis, if the instance you’re on has them. Fosstodon has some open source project ones. ?
Hashtags work in the exact same way as Twitter – just use #YourHastag within your Toot. Hashtags within Toots can then be clicked to see who else is using that Hashtag – another great way of finding new people to follow!
If you want to add an image (or multiple images) to your Toots, just hit the camera icon.
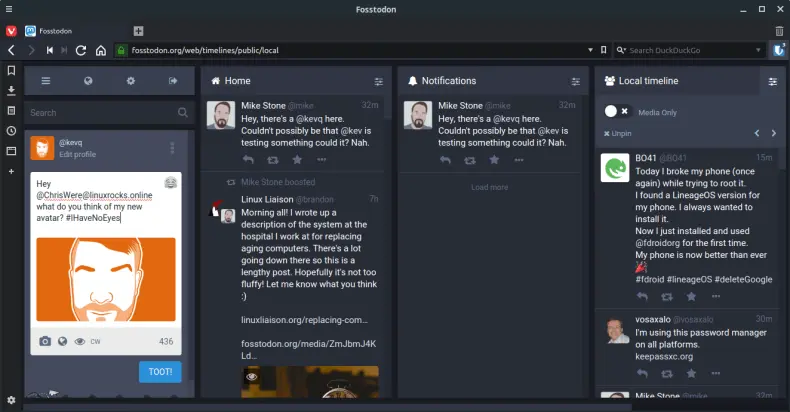
Media can also be marked as sensitive using the Eye icon. This will hide the image behind a Content Wall explaining that the image is sensitive and that they need to click in order to view the image. This can be useful when posting images that could be offensive to some people.
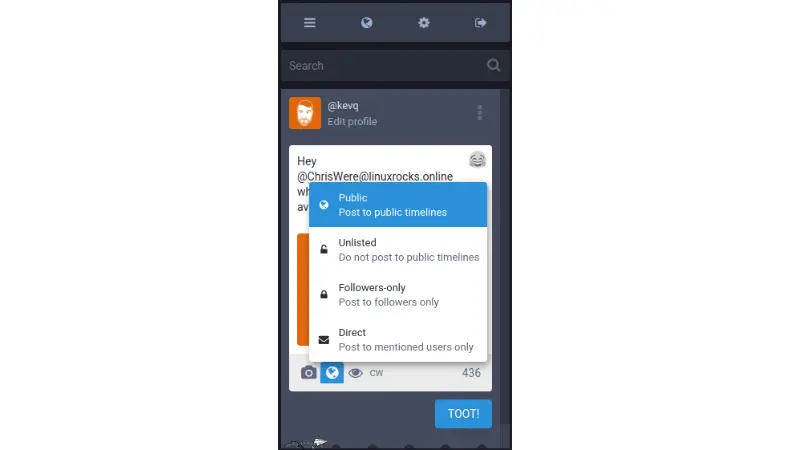
Privacy & Content Walls
You can set the privacy of all the Toots you send; to do this, use the globe icon. There are a number of privacy levels for Toots. These range from public, where everyone can see them, to completely private where only the person @mentioned can see it – this is a direct message.
Full disclosure – even for direct messages, your Toots are not completely private; the instance admins can see these within the admin interface also. This is to stop spam and abuse within private messages. However, most instance admins will not look at user DMs unless one is reported.
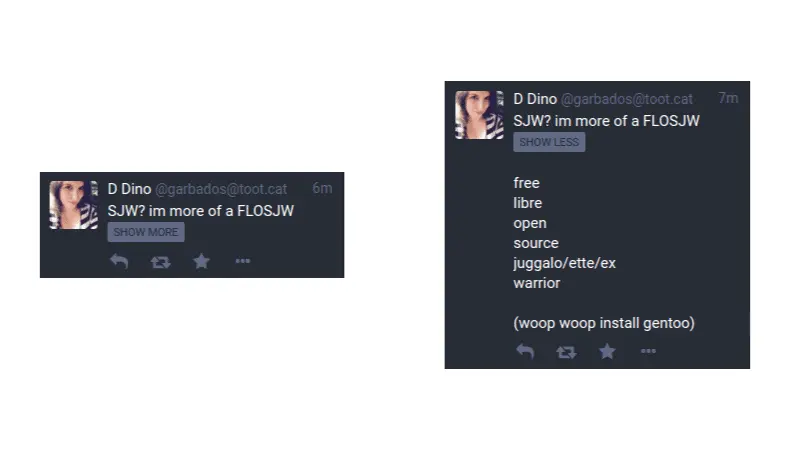
Content Walls are another way of ensuring your Toots stay somewhat private, in that other users will need to click an approval before being shown your Toot. This comes in useful when posting things that could be controversial, such as politics, religion or things like movie spoilers.
When posting behind a Content Wall, you can set a title/summary, but the bulk of your Toot is hidden behind the wall and people who see the Toot will only see a message asking them to click to view more.
Final Thoughts
That’s it for this Mastodon getting started guide. I hope you guys have found this useful. Remember, this is just a getting started guide and is by no means verbose. I will probably do another post about some of the more advanced features of the Mastodon UI.
Having said that, it’s also good to simply have a click around and see what’s there. You won’t be able to break anything.
Subscribe for more!
You don't have to keep coming back here to read my latest waffle. There's a couple of ways to subscribe to receive updates whenever I publish new content.